2.3.4 Calibrate Program Coordinates
Press F4 to open manual control window, first use the homing function to home the machine, but absolute position system got no need of homing, (MX, MY, MZ, MA, MB and MC are the machine coordinates and the machine zero is the reference), and then use other manual functions to calibrate the program zero point of the workpiece (usually the CNC program will set certain point of the workpiece as program zero, such as the lower left corner of the workpiece or the workpiece center) (Note: Before performing calibration, fix the workpiece on the table , The tool is locked on the spindle), (Note: the number of coordinate groups has been selected). manual calibration can be used in the fast function, within the manual control window, to calibrate the offset to the middle.
Calibrate Program Coordinates (Take INCON-M86 for example)
Calibration program coordinates by following three ways:
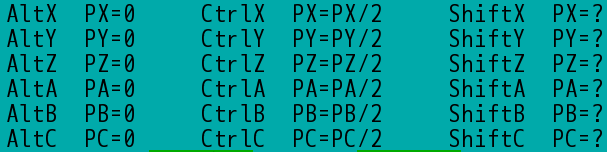
1. Set the tool tip position to program coordinate origin
Press Alt+X (Alt+Y or Alt+Z) in manual mode, the system automatically calculates the axis offset and enters it in the program coordinate offset table dialog box, so that the program coordinate axis = 0, after each axis is calibrated, Then press ENTER key to save and leave manual mode, if press ESC key, it will not save and leave manual mode.
2. Do not set the tool tip position as the program coordinate zero
Take the X axis as an example. Sometimes the tool tip is not necessarily the zero of the program, according to user needs custom tool tip PX value. Press Shift+X in manual mode, the X-Axis Program Position dialog box will pop up, as shown. Enter the value of PX in the dialog box, and press the ENTER key, the system will automatically calculate and input the offset value to X-axis offset in the program coordinate offset table dialog box. After each axis is calibrated, press ENTER Save and leave the manual mode, if you press the ESC key is not stored when leave manual mode.
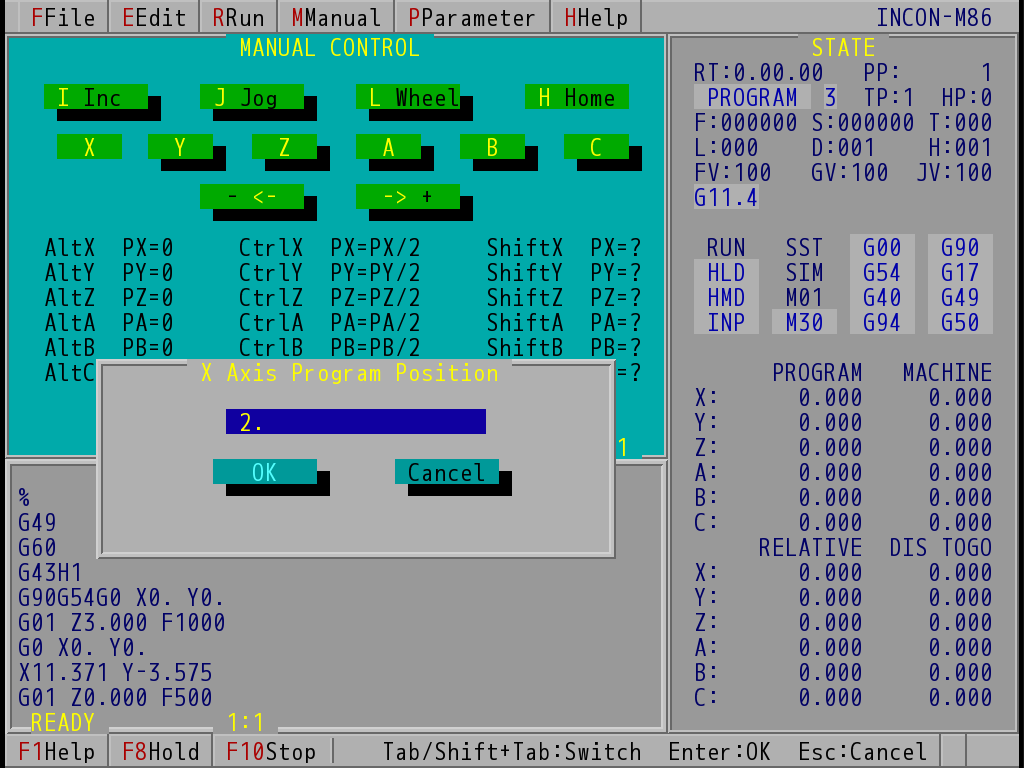
Program Position Conversation Dialog Box (Take INCON-M86 for example)
3. The workpiece centre as the program coordinate zero
With axis X as example, conduct execution way 1 first to set PX=0 in one side, then move the tool to the farthest side of the workpiece relative to the X axis of PX=0 and press CTRL+X. The program will turn into PX/2. After each axis is calibrated, press ENTER again to save and leave manual mode, if ESC key is pressed, it will not be saved and leave manual mode. At this time, you can check the position state window to see PX position to determine whether the program coordinates offset is set correctly. The same apply for other axials.
Note: |
Select the parameter to Message for closing manual window, it will pop up the prompt menu; if not selected, press Enter will replace and leave, press ESC is not stored and leave. |